
Django mysql SSL 证书配置
Django的mysql配置在settings.py 里面
具体配置如下:
具体配置如下:
ca_path = '/etc/ssl/certs/ca-certificates.crt' # 证书地址收起阅读 »
DATABASES = {
'default': {
'ENGINE': 'django.db.backends.mysql',
'NAME': 'wordpress',
'USER': 'root',
'PASSWORD': '123456',
'HOST': '127.0.0.1`',
'PORT': 3306,
'OPTIONS': {'ssl':{'KEY': ca_path}}
}
}


SQLAlchemy python数据库实战 【勘误与电子书pdf下载】
SQLAlchemy python数据库实战

勘误:
P64 页:
backref = backref('orders',order_by=id) 应该改为 : backref = backref('orders',order_by=order_id)
P68页:
cookie= relationship('Cookie',uselist=False,order_by=id) 应该改为 : cookie= relationship('Cookie',uselist=False,order_by=order_id)
总体来说,动物书还是不错的。
需要pdf电子书的朋友,可以关注下面公众号,

后台回复:
SQLAlchemy python数据库实战
获取电子书下载链接。
收起阅读 »
勘误:
P64 页:
backref = backref('orders',order_by=id) 应该改为 : backref = backref('orders',order_by=order_id)
P68页:
cookie= relationship('Cookie',uselist=False,order_by=id) 应该改为 : cookie= relationship('Cookie',uselist=False,order_by=order_id)
总体来说,动物书还是不错的。
需要pdf电子书的朋友,可以关注下面公众号,
后台回复:
SQLAlchemy python数据库实战
获取电子书下载链接。
收起阅读 »
SQLAlchemy mysql ssl证书 连接
如果你的mysql 服务器需要ssl证书才能连接,那么平时的create_engine连接语句是会报错的。
需要加上参数:
connect_args,加上ssl路径。
需要加上参数:
connect_args,加上ssl路径。
from sqlalchemy import create_engine收起阅读 »
ca_path = '/etc/ssl/certs/ca-certificates.crt' # linux 证书路径
ssl_args = {'ssl_ca': ca_path}
engine = create_engine('mysql+pymysql://root:password@127.0.01:3306/wordpressdb?charset=utf8',
echo = True,
connect_args=ssl_args
)
python社工库合集

https://github.com/soxoj/maigret
这个项目太吓人了,输入 id,就能把互联网上你的相关账号全部扒出来,而且不仅仅是简单的 id 匹配,你的用户资料字段也会被匹配,而且连 pornhub/xvideo 账号都有。
使用方法(python):
# install from pypi
pip3 install maigret
# usage
maigret username

个人亲测了一下,这个库主要针对国内外一些大型的网站进行扫描,得到的结果还是很准的。
如果有专门针对国内网站的库,欢迎留言回复~
收起阅读 »
把抖音的小姐姐舞蹈视频的背景音乐静音了,瞬间觉得她们好傻

PS: 找到了一个视频接口,猜测是哪个爬虫项目的。可以不断的获取新的抖音小姐姐视频。后面因为硬盘空间不够就停掉了。

万一免五 新开股票证券账户 注意事项
问:如何通过手机客户端进行自助开户?
答:通过扫描专属开户二维码或下载安装客户端手机版,即可进行开户和交易。1个工作日后可调好佣金,长期有效
问:手机开户对网络有什么要求?
答:根据中登公司规定,个人客户凭借数字证书在网上开户需要进行视频见证。因此,开户过程中需要保持较快速度的网络通信,建议您在4G及以上或Wi-Fi的环境下进行手机开户将会更流畅。
问:手机开户有时间要求吗?
答:手机开户7*24小时受理,您可以随时提交开户申请。交易时间几分钟审核通过,非交易时间第二个交易日早上九点左右审核通过
问:哪些手机系统支持手机开户?
答:苹果及安卓系统手机都支持手机开户;建议更新至苹果/安卓系统最新版本。为了您在开户过程中能流畅地进行视频,请您准备具备双摄像头的手机(摄像头像素在500万以上效果更佳),并确保网络流畅。
问:手机开户的过程有哪些?
答:您只需进行上传证件照片、视频录像、填写信息的操作,3-5分钟即可完成开户手续。

问:为什么拍的身份证照片都不符合要求?
答:必须为您本人有效二代身份证原件拍摄,拍摄的身份证照片要求身份证图像边框完整,文字清晰,亮度均匀,无水印,无遮挡。请保持网络通顺、稳定,拍摄环境光线充足。
问:为什么要进行视频见证?
答:视频见证是为确保您的资产安全,根据监管机构要求,投资者网上开立中国登记公司股东账户还必须和证券公司网上开户见证人员通过网上视频进行实时视频见证,见证过程中见证人员将对您上传的证件资料和视频内容进行审核,并对见证视频进行录像。视频见证必须由您本人亲自办理。
问:视频见证如何操作?
答:请确保头像在摄像范围内,用普通话阅读界面上的文字提示。还可以在拍摄完之后,点击“视频回放”确认图像和声音是否清晰。
问:手机版客户端可以在哪些手机应用市场下载?
答:您可以在官网【软件下载】栏目或通过以下手机市场下载客户端。苹果系统的手机用户可以在App Store中搜索“xxxx”下载iPhone版。安卓系统的手机用户可以在手机应用商店、360手机助手、应用宝、百度手机助手等主流手机应用市场中搜索“xxxx”下载Android版。
问:手机收不到验证码怎么办?
答:由于网络等原因,验证码可能存在延时,60秒后仍未收到验证码,可申请重新获取,若始终无法获取验证码,请致电95357进行咨询。
问:身份验证失败是什么原因?
答:姓名和身份证需经过公安局官方联网系统验证,请确保输入的姓名和身份证信息正确。
问:身份证正反面如何区分?
答:身份证正面是身份证头像面,背面是发证机关和有效期面。
问:身份证识别失败是什么原因?
答:请将手机相机调整为“横屏模式”再进行身份证拍摄,并尽可能确保照片上的信息清晰可辨。
问:哪些交易密码不能通过?
答:根据规定,交易密码不允许设置成简单密码,简单密码包括:(1)密码为同一数字。;(2)数字顺序递增或递减,例如123456,654321;(3)数字前后三位递增重复,例如123123。
问:创业板可以开通吗?
答: 如果您已在其他券商开通过创业板,仍可通过对应券商手机APP业务办理里面转签,在其他券商的创业板权限不受影响。如果第一次开通,需要满足开户两年,连续二十个工作日日均资产十万+,才能在手机端开通.
问:“一人三户”是什么意思?
答:根据中国证券登记结算有限公司发布的关于修订《证券账户业务指南》具体修订内容“一个投资者只能申请开立一个一码通账户。一个投资者在同一市场最多可以申请开立3个沪A股账户、20个深A张账号,封闭式基金账户,只能申请开立1个信用账户、B股账户。”
问:我已在其他券商开了股票账户,能否通过一人多户新开账户,具体如何办理?
答:支持“一人多户”,如果您已经在其他证券公司开了A股股票账户,您同样可以新开两个其他证券公司账户。
问:开户的结果什么时候可以告知?
答:如果您是在交易日上午9:30-16:00成功提交开户申请,则开户结果最快将在交易时间内实时反馈给您;如果您是在交易日上午0:00-9:30成功提交开户申请,则开户结果最快会在当日反馈给您;如果您是在16:00后成功提交开户申请,则开户结果最快会在下一交易日内反馈给您。
问:开户进度如何得知?
答:我司会及时将开户结果以短信的方式告知您,您也可以自行在手机端开户界面,输入您开户时使用的手机号码,在获取验证码后并验证成功后即可看到您的开户进度。
问:我在其他券商这里开过股票账户,原券商绑定的银行卡可以用吗?
答:绝大多数银行支持一卡绑定多家券商。
问:手机开户是否提供纸质证券账户卡?
答:手机开户暂不提供纸质账户卡。根据中登公司相关规则,公司会通过证券交易终端、短信等多种途径向投资者反馈证券账户号码。
最后,仍有少量头部券商万一免X名额,扫码获取,备注:开户
 收起阅读 »
答:通过扫描专属开户二维码或下载安装客户端手机版,即可进行开户和交易。1个工作日后可调好佣金,长期有效
问:手机开户对网络有什么要求?
答:根据中登公司规定,个人客户凭借数字证书在网上开户需要进行视频见证。因此,开户过程中需要保持较快速度的网络通信,建议您在4G及以上或Wi-Fi的环境下进行手机开户将会更流畅。
问:手机开户有时间要求吗?
答:手机开户7*24小时受理,您可以随时提交开户申请。交易时间几分钟审核通过,非交易时间第二个交易日早上九点左右审核通过
问:哪些手机系统支持手机开户?
答:苹果及安卓系统手机都支持手机开户;建议更新至苹果/安卓系统最新版本。为了您在开户过程中能流畅地进行视频,请您准备具备双摄像头的手机(摄像头像素在500万以上效果更佳),并确保网络流畅。
问:手机开户的过程有哪些?
答:您只需进行上传证件照片、视频录像、填写信息的操作,3-5分钟即可完成开户手续。
问:为什么拍的身份证照片都不符合要求?
答:必须为您本人有效二代身份证原件拍摄,拍摄的身份证照片要求身份证图像边框完整,文字清晰,亮度均匀,无水印,无遮挡。请保持网络通顺、稳定,拍摄环境光线充足。
问:为什么要进行视频见证?
答:视频见证是为确保您的资产安全,根据监管机构要求,投资者网上开立中国登记公司股东账户还必须和证券公司网上开户见证人员通过网上视频进行实时视频见证,见证过程中见证人员将对您上传的证件资料和视频内容进行审核,并对见证视频进行录像。视频见证必须由您本人亲自办理。
问:视频见证如何操作?
答:请确保头像在摄像范围内,用普通话阅读界面上的文字提示。还可以在拍摄完之后,点击“视频回放”确认图像和声音是否清晰。
问:手机版客户端可以在哪些手机应用市场下载?
答:您可以在官网【软件下载】栏目或通过以下手机市场下载客户端。苹果系统的手机用户可以在App Store中搜索“xxxx”下载iPhone版。安卓系统的手机用户可以在手机应用商店、360手机助手、应用宝、百度手机助手等主流手机应用市场中搜索“xxxx”下载Android版。
问:手机收不到验证码怎么办?
答:由于网络等原因,验证码可能存在延时,60秒后仍未收到验证码,可申请重新获取,若始终无法获取验证码,请致电95357进行咨询。
问:身份验证失败是什么原因?
答:姓名和身份证需经过公安局官方联网系统验证,请确保输入的姓名和身份证信息正确。
问:身份证正反面如何区分?
答:身份证正面是身份证头像面,背面是发证机关和有效期面。
问:身份证识别失败是什么原因?
答:请将手机相机调整为“横屏模式”再进行身份证拍摄,并尽可能确保照片上的信息清晰可辨。
问:哪些交易密码不能通过?
答:根据规定,交易密码不允许设置成简单密码,简单密码包括:(1)密码为同一数字。;(2)数字顺序递增或递减,例如123456,654321;(3)数字前后三位递增重复,例如123123。
问:创业板可以开通吗?
答: 如果您已在其他券商开通过创业板,仍可通过对应券商手机APP业务办理里面转签,在其他券商的创业板权限不受影响。如果第一次开通,需要满足开户两年,连续二十个工作日日均资产十万+,才能在手机端开通.
问:“一人三户”是什么意思?
答:根据中国证券登记结算有限公司发布的关于修订《证券账户业务指南》具体修订内容“一个投资者只能申请开立一个一码通账户。一个投资者在同一市场最多可以申请开立3个沪A股账户、20个深A张账号,封闭式基金账户,只能申请开立1个信用账户、B股账户。”
问:我已在其他券商开了股票账户,能否通过一人多户新开账户,具体如何办理?
答:支持“一人多户”,如果您已经在其他证券公司开了A股股票账户,您同样可以新开两个其他证券公司账户。
问:开户的结果什么时候可以告知?
答:如果您是在交易日上午9:30-16:00成功提交开户申请,则开户结果最快将在交易时间内实时反馈给您;如果您是在交易日上午0:00-9:30成功提交开户申请,则开户结果最快会在当日反馈给您;如果您是在16:00后成功提交开户申请,则开户结果最快会在下一交易日内反馈给您。
问:开户进度如何得知?
答:我司会及时将开户结果以短信的方式告知您,您也可以自行在手机端开户界面,输入您开户时使用的手机号码,在获取验证码后并验证成功后即可看到您的开户进度。
问:我在其他券商这里开过股票账户,原券商绑定的银行卡可以用吗?
答:绝大多数银行支持一卡绑定多家券商。
问:手机开户是否提供纸质证券账户卡?
答:手机开户暂不提供纸质账户卡。根据中登公司相关规则,公司会通过证券交易终端、短信等多种途径向投资者反馈证券账户号码。
最后,仍有少量头部券商万一免X名额,扫码获取,备注:开户
收起阅读 »
Ptrade量化交易之 拆单买入卖出操作
在交易过程中,如果遇到成交量小的股票或者可转债,etf,稍微买多一些会对现价造成冲击,价格容易被你自己拉起来。所以假如你的交易量很大的话,一般最好使用拆单操作。 可以参考下面的python拆单代码:
注:代码里面针对的是可转债交易,股票的话把这一行:
remain_count=int(remain_count/10)*10 改为
remain_count=int(remain_count/100)*100 就可以了
股票100股整数倍买,转债是10张倍数买。
code,direction,target_count : 第一个代码,第二个买卖方向,第三个是目标数目
each_order_count = 100 # 每单的股数,张数
更多ptrade实盘代码,欢迎关注个人知识星球
 收起阅读 »
注:代码里面针对的是可转债交易,股票的话把这一行:
remain_count=int(remain_count/10)*10 改为
remain_count=int(remain_count/100)*100 就可以了
股票100股整数倍买,转债是10张倍数买。
code,direction,target_count : 第一个代码,第二个买卖方向,第三个是目标数目
each_order_count = 100 # 每单的股数,张数
def split_order(code,direction,target_count):

    '''

    拆单

    :param code: 股票代码

    :param direction: 买:1 卖:-1

    :param target_count: 总共要卖的股数

    :return:

    '''


    SPLIT_ORDER_DELAY =1

    each_order_count = 100 # 每单的股数,张数

    count = int(target_count/each_order_count)

    remain_count = target_count%each_order_count


    for i in range(count):

        ret = order(code,direction*each_order_count)

        time.sleep(SPLIT_ORDER_DELAY)


    if direction==1:

        remain_count=int(remain_count/10)*10 # 可转债买的时候只能10的倍数交易,


    if remain_count>0:

        ret = order(code,direction*each_order_count)
更多ptrade实盘代码,欢迎关注个人知识星球
收起阅读 »
Ptrade挂单后撤单函数 实现
在ptrade的每一笔挂单,都不一定能够保证很成功,比如刚挂了单,股票就飞了。
所以也需要有撤单,重新挂的动作。
中间需要有个等待时间。
1。 买入后,并不一定买上成交,需要一点时间消化,尤其是量大的单子,得要慢慢吃掉。
2。 成交回报并不是实时的。记住,ptrade的成交回报是有个延时,约9秒。 也就是你成交后,立即调用get_positions函数 看看你持仓,是无法看到你刚刚买入的股票数据的。
比如:
下面的示例代码,获取还在挂单的委托单子,然后逐个撤销,重新按照最新的市价下单。
后话:
很多投资者没有编程基础,学习起来会很吃力,耗费大量的时间,得不偿失。写出来的代码也是很多bug而不自知。等到实盘了用真金白银 得到了教训,还不如早期跟一两个人有经验的人学习,甚至找个代写代码就好了。
当然,能力超强,精力旺盛的大神就无视了,这个人折腾起来什么都可以搞得有模有样。
收起阅读 »
所以也需要有撤单,重新挂的动作。
    order(code,amount) # 买入或者卖出


    time.sleep(CANCEL_ORDER_TIME) # 等待片刻


    cancel_order_reorder(context) # 进入撤单函数
中间需要有个等待时间。
1。 买入后,并不一定买上成交,需要一点时间消化,尤其是量大的单子,得要慢慢吃掉。
2。 成交回报并不是实时的。记住,ptrade的成交回报是有个延时,约9秒。 也就是你成交后,立即调用get_positions函数 看看你持仓,是无法看到你刚刚买入的股票数据的。
比如:
def initialize(context):这样你是无法获取的你的持仓的。
g.security = '600570.SS'
set_universe(g.security)
def handle_data(context, data):
order(g.security,100)
position = get_position(g.security)
log.info(position)
下面的示例代码,获取还在挂单的委托单子,然后逐个撤销,重新按照最新的市价下单。
def cancel_order_reorder(context):

    '''

    取消订单,重新下单

    :return:

    '''


    open_orders = get_open_orders()


    for _order in open_orders:

        _id = _order.id

        amount=_order.amount

        filled=_order.filled

        next_amount = amount-filled

        code = _order.symbol

        log.info('撤单{} - {}'.format(code,next_amount))

        cancel_order(_id)


        # time.sleep(1)

        log.info('重新下单{} 数量{}'.format(code,next_amount))

        order(code,next_amount)
后话:
很多投资者没有编程基础,学习起来会很吃力,耗费大量的时间,得不偿失。写出来的代码也是很多bug而不自知。等到实盘了用真金白银 得到了教训,还不如早期跟一两个人有经验的人学习,甚至找个代写代码就好了。
当然,能力超强,精力旺盛的大神就无视了,这个人折腾起来什么都可以搞得有模有样。
收起阅读 »
降低股票交易佣金成本,万一免五还有吗
大家一般自己去券商APP开户,默认提示都是万2.5费率,单笔不满5元收取5元手续费,意思就是如果你买一万块钱的股票虽然佣金是1万*万2.5=2.5,但是不好意思,因为低于最低收费5元,直接按五块收取!
所以免5:这个就好解释了,就算你买1000块钱的股票也是按照佣金比例收取。如果费率是万1,那么买1000块钱股票就只收0.1元。交易成本对比一目了然,来,看图说话

股票交易成本(证券公司的交割单中明列的)包括如下几种,
1. 印花税
卖出的时候千分之1,政府收。这个是政府统一收取,也是股民为国家应尽的义务。是按实收取的,没有起步收费,是1分钱就收1分。
2. 过户费
沪深交易所买卖都有,万分之0.2,中国登记结算公司收。中国登记结算公司是为证券交易提供集中登记、存管与结算服务的法人。所有投资者的交易结算最终都由他负责,他收取的费用对所有券商和投资者也是无差别的。这个也是按实收的,没有起步收费。
3. 证券公司手续费
买卖都有,一般证券公司手续费包含规费。规费是交易所收取,由两部分组成:
(1) 证管费万分之0.2。
(2) 证券交易经手费万分之0.487。
因此规费合计为万分之0.687。买卖双边收取。规费在券商的交割单中并不单列,与手续费合在一起收取。
万一免五指的就是这个部分了。假设我交易1千元股票,如果手续费率是万1,那么手续费应为0.1元,但一般情况下手续费不足5元按5元收取,所以实收手续费是5元。在免5(免五)的情况下,手续费按实收0.1元,也就是节省了4.9元手续费。
新手容易踩坑,随便开了一个户,等交易的时候才发现原来扣钱这么多,见过太多的新手开户时并不了解费率,交易时才感觉到肉疼,所以希望大家在开户时可以多比较,多对比,找到适合自己的券商。而且要找低佣渠道的券商。降低股票交易成本
目前笔者获取了最低开户福利渠道,扫码获取详情,备注:开户
收起阅读 »
所以免5:这个就好解释了,就算你买1000块钱的股票也是按照佣金比例收取。如果费率是万1,那么买1000块钱股票就只收0.1元。交易成本对比一目了然,来,看图说话
股票交易成本(证券公司的交割单中明列的)包括如下几种,
1. 印花税
卖出的时候千分之1,政府收。这个是政府统一收取,也是股民为国家应尽的义务。是按实收取的,没有起步收费,是1分钱就收1分。
2. 过户费
沪深交易所买卖都有,万分之0.2,中国登记结算公司收。中国登记结算公司是为证券交易提供集中登记、存管与结算服务的法人。所有投资者的交易结算最终都由他负责,他收取的费用对所有券商和投资者也是无差别的。这个也是按实收的,没有起步收费。
3. 证券公司手续费
买卖都有,一般证券公司手续费包含规费。规费是交易所收取,由两部分组成:
(1) 证管费万分之0.2。
(2) 证券交易经手费万分之0.487。
因此规费合计为万分之0.687。买卖双边收取。规费在券商的交割单中并不单列,与手续费合在一起收取。
万一免五指的就是这个部分了。假设我交易1千元股票,如果手续费率是万1,那么手续费应为0.1元,但一般情况下手续费不足5元按5元收取,所以实收手续费是5元。在免5(免五)的情况下,手续费按实收0.1元,也就是节省了4.9元手续费。
新手容易踩坑,随便开了一个户,等交易的时候才发现原来扣钱这么多,见过太多的新手开户时并不了解费率,交易时才感觉到肉疼,所以希望大家在开户时可以多比较,多对比,找到适合自己的券商。而且要找低佣渠道的券商。降低股票交易成本
目前笔者获取了最低开户福利渠道,扫码获取详情,备注:开户
收起阅读 »
可转债 最新的不下修转股价 名单 持续更新
已公布不下修转股价的可转债列表汇总
数据更新至2022年9月24日。
如果可转债公布了某个时间段内的不下修转股价,在溢价率很高的情况下,那么在该时间段内,其溢价率回归的办法只剩拉正股了,而在这上涨阶段中,站在概率面,持有转债的涨幅是会大幅低于正股的。
现在市场的情况也是这样,如果可转债公布不下修,第二天的开盘会以低开反映出来。
数据来源:巨潮。
文末附获取原始数据方法。
 点击查看大图
 点击查看大图
 点击查看大图
链接: https://pan.baidu.com/s/1TVAR3nftALTWR0VTnagVhg 提取码: 5wde
更多公众号文章代码与数据,可输入:帮助

收起阅读 »
数据更新至2022年9月24日。
如果可转债公布了某个时间段内的不下修转股价,在溢价率很高的情况下,那么在该时间段内,其溢价率回归的办法只剩拉正股了,而在这上涨阶段中,站在概率面,持有转债的涨幅是会大幅低于正股的。
现在市场的情况也是这样,如果可转债公布不下修,第二天的开盘会以低开反映出来。
数据来源:巨潮。
文末附获取原始数据方法。
链接: https://pan.baidu.com/s/1TVAR3nftALTWR0VTnagVhg 提取码: 5wde
更多公众号文章代码与数据,可输入:帮助
收起阅读 »
Ptrade在一个循环事件里 能否不断获取股票实时价格?
假设在一个事件循环里:
如:
run_daily(context, get_price, '09:44')
定义的get_price 函数,
然后get_price函数里面有一个死循环,不断地获取价格。
因为ptrade的行情切片 是每3秒更新的一次的,如果行情没更新,那么当前的价格也是过去最近的一个3s的价格。
现在问题是,在一个固定的时间里面,不断地读取价格函数,能获取到最新的价格吗 ?
我们用代码实践一下:
输出的结果:
为了更为直观,过滤掉另外一只可转债
只保留一只
更多ptrade实盘代码,请常见个人星球。
【可转债追涨杀跌日内T+0,双低 低价 低溢价 规模多因子轮动】


收起阅读 »
如:
run_daily(context, get_price, '09:44')
定义的get_price 函数,
然后get_price函数里面有一个死循环,不断地获取价格。
因为ptrade的行情切片 是每3秒更新的一次的,如果行情没更新,那么当前的价格也是过去最近的一个3s的价格。
现在问题是,在一个固定的时间里面,不断地读取价格函数,能获取到最新的价格吗 ?
我们用代码实践一下:
import time

def initialize(context):

    # 初始化策略


    run_daily(context, get_price, '09:44')


def handle_data(context, data):

    pass


def get_price(context):

    for i in range(10):

        target_list =['113585.SS','123057.SZ']

        bond_gear_price_target = get_gear_price(target_list)


        for code in target_list:

            price = bond_gear_price_target[code]['offer_grp'][1][0]

            log.info('code: {} price {} '.format(code,price))


        time.sleep(1)
输出的结果:
2022-09-28 10:31:00 - INFO - code: 113585.SS price 169.147

2022-09-28 10:31:00 - INFO - code: 128053.SZ price 144.785

2022-09-28 10:31:01 - INFO - code: 113585.SS price 169.147

2022-09-28 10:31:01 - INFO - code: 128053.SZ price 144.785

2022-09-28 10:31:02 - INFO - code: 113585.SS price 169.156

2022-09-28 10:31:02 - INFO - code: 128053.SZ price 144.785

2022-09-28 10:31:03 - INFO - code: 113585.SS price 169.156

2022-09-28 10:31:03 - INFO - code: 128053.SZ price 144.8

2022-09-28 10:31:04 - INFO - code: 113585.SS price 169.199

2022-09-28 10:31:04 - INFO - code: 128053.SZ price 144.8

2022-09-28 10:31:05 - INFO - code: 113585.SS price 169.199

2022-09-28 10:31:05 - INFO - code: 128053.SZ price 144.8

2022-09-28 10:31:06 - INFO - code: 113585.SS price 169.199

2022-09-28 10:31:06 - INFO - code: 128053.SZ price 144.785

2022-09-28 10:31:07 - INFO - code: 113585.SS price 169.068

2022-09-28 10:31:07 - INFO - code: 128053.SZ price 144.785

2022-09-28 10:31:08 - INFO - code: 113585.SS price 169.068

2022-09-28 10:31:08 - INFO - code: 128053.SZ price 144.785

2022-09-28 10:31:09 - INFO - code: 113585.SS price 169.068

2022-09-28 10:31:09 - INFO - code: 128053.SZ price 144.746

2022-09-28 10:31:10 - INFO - code: 113585.SS price 169.066

2022-09-28 10:31:10 - INFO - code: 128053.SZ price 144.746

2022-09-28 10:31:11 - INFO - code: 113585.SS price 169.066

2022-09-28 10:31:11 - INFO - code: 128053.SZ price 144.746

2022-09-28 10:31:12 - INFO - code: 113585.SS price 169.066

2022-09-28 10:31:12 - INFO - code: 128053.SZ price 144.785

2022-09-28 10:31:13 - INFO - code: 113585.SS price 169.068

2022-09-28 10:31:13 - INFO - code: 128053.SZ price 144.785

2022-09-28 10:31:14 - INFO - code: 113585.SS price 169.068

2022-09-28 10:31:14 - INFO - code: 128053.SZ price 144.785

2022-09-28 10:31:15 - INFO - code: 113585.SS price 169.068

2022-09-28 10:31:15 - INFO - code: 128053.SZ price 144.692

2022-09-28 10:31:16 - INFO - code: 113585.SS price 169.068

2022-09-28 10:31:16 - INFO - code: 128053.SZ price 144.692

2022-09-28 10:31:17 - INFO - code: 113585.SS price 169.068

2022-09-28 10:31:17 - INFO - code: 128053.SZ price 144.692

2022-09-28 10:31:18 - INFO - code: 113585.SS price 169.068

2022-09-28 10:31:18 - INFO - code: 128053.SZ price 144.691

2022-09-28 10:31:19 - INFO - code: 113585.SS price 169.062

2022-09-28 10:31:19 - INFO - code: 128053.SZ price 144.691

2022-09-28 10:31:20 - INFO - code: 113585.SS price 169.062
为了更为直观,过滤掉另外一只可转债
只保留一只
2022-09-28 10:31:00 - INFO - code: 113585.SS price 169.147可以看到价格也是基本没个3s更新一次。
2022-09-28 10:31:01 - INFO - code: 113585.SS price 169.147
2022-09-28 10:31:02 - INFO - code: 113585.SS price 169.156
2022-09-28 10:31:03 - INFO - code: 113585.SS price 169.156
2022-09-28 10:31:04 - INFO - code: 113585.SS price 169.199
2022-09-28 10:31:05 - INFO - code: 113585.SS price 169.199
2022-09-28 10:31:06 - INFO - code: 113585.SS price 169.199
2022-09-28 10:31:07 - INFO - code: 113585.SS price 169.068
2022-09-28 10:31:08 - INFO - code: 113585.SS price 169.068
2022-09-28 10:31:09 - INFO - code: 113585.SS price 169.068
2022-09-28 10:31:10 - INFO - code: 113585.SS price 169.066
2022-09-28 10:31:11 - INFO - code: 113585.SS price 169.066
更多ptrade实盘代码,请常见个人星球。
【可转债追涨杀跌日内T+0,双低 低价 低溢价 规模多因子轮动】
收起阅读 »
国庆节 微信头像红旗 制作 附 python代码 和 红旗素材
国庆节的时候,很多地方都会升挂国旗,庆祝祖国一年一度的节日。
给自己制作国旗头像,是一件很有意义的事。微信官方就曾经举办过活动。
制作国旗头像的方法有很多,本文给大家介绍用Python制作渐变的微信国旗头像。

渐变的国旗头像效果非常好看。
制作方式也很简单,下面介绍实现方法,可以复制本文的代码,制作属于自己的国旗头像。
1.准备国旗图片

声明:严禁非法使用国旗图片。在国旗图片下载页面下方有《国旗法》等相关规定。
本文使用1024像素的图片。
2.准备头像图片
登录自己的微信,打开个人信息,点击头像,点击右上角的三个点,将图片保存到手机,
然后将图片传到电脑上。
为了不失一般性,本文使用的图片是我从网络上获取的一张600*600像素的头像图片。
准备好后,将国旗图片和头像图片拷贝到代码同一个目录下。
代码实现
先安装Python中用于处理图片的pillow库。
安装完成后,使用pillow库来制作国旗头像。
只需要十几行代码就能实现。完整代码如下。
到此为止,已经制作好了国旗头像了。
下面是代码的详细结束:
代码介绍:
本文介绍了用Python制作微信国旗头像的方法。在本文的代码中,以左上角为圆心,离圆心越远越透明,可以修改key值,调整国旗透明变化的范围。
如果需要制作其他渐变类型,如以右上角为圆心逐渐透明、从左侧向右侧逐渐透明、从上到下逐渐透明等,可以修改国旗渐变部分的代码、翻转图片等。
收起阅读 »
给自己制作国旗头像,是一件很有意义的事。微信官方就曾经举办过活动。
制作国旗头像的方法有很多,本文给大家介绍用Python制作渐变的微信国旗头像。
渐变的国旗头像效果非常好看。
制作方式也很简单,下面介绍实现方法,可以复制本文的代码,制作属于自己的国旗头像。
1.准备国旗图片
声明:严禁非法使用国旗图片。在国旗图片下载页面下方有《国旗法》等相关规定。
本文使用1024像素的图片。
2.准备头像图片
登录自己的微信,打开个人信息,点击头像,点击右上角的三个点,将图片保存到手机,
然后将图片传到电脑上。
为了不失一般性,本文使用的图片是我从网络上获取的一张600*600像素的头像图片。
准备好后,将国旗图片和头像图片拷贝到代码同一个目录下。
代码实现
先安装Python中用于处理图片的pillow库。
pip install pillow
安装完成后,使用pillow库来制作国旗头像。
只需要十几行代码就能实现。完整代码如下。
# coding=utf-8

from PIL import Image

import math


key = 3.2# 修改key值可以调整国旗的范围,推荐2~4之间的数字,支持小数

motherland_flag = Image.open('flag-1024.png')

head_picture = Image.open('mmexport1663893338571.png')

# 截图国旗上的五颗五角星

flag_width, flag_height = motherland_flag.size

crop_flag = motherland_flag.crop((66, 0, flag_height+66, flag_height))

# 将国旗截图处理成颜色渐变

for i in range(flag_height):

    for j in range(flag_height):

            color = crop_flag.getpixel((i, j))

            distance = int(math.sqrt(i*i + j*j))

            alpha = 255 - int(distance//key)

            new_color = (*color[0:-1], alpha if alpha > 0 else 0)

            crop_flag.putpixel((i, j), new_color)

# 修改渐变图片的尺寸,适应头像大小,粘贴到头像上

new_crop_flag = crop_flag.resize(head_picture.size)

head_picture.paste(new_crop_flag, (0, 0), new_crop_flag)

# 保存自己的国旗头像

head_picture.save('国旗头像.png')
到此为止,已经制作好了国旗头像了。
下面是代码的详细结束:
代码介绍:
代码介绍:


导入需要使用的Python库,pillow库用于对图片进行截取、大小修改、粘贴等处理。math库用于计算像素点的距离。


使用Image.open()方法,读取准备好的国旗图片和头像图片到代码中。


对国旗图片进行截取,获取一张正方形的图片,截取时调整截取位置,保证5颗五角星完整展示在截图中。


crop()方法中传入的是一个(left, upper, right, lower)的元组,分别是截图的左、上、右、下像素位置。

将正方形国旗截图设置成透明度渐变的图片。国旗图片的模式默认是RGBA,本文需要的刚好是RGBA(red,green,blue,alpha)模式的图片,RGBA模式的图片颜色值是一个长度为4的元组,我们修改不同像素点的A值即可将图片设置成渐变。


本文是以国旗左上角为圆心,离圆心越远的像素点A值越小,像素点越透明。使用getpixel()和putpixel()两个方法来获取和重设像素点的颜色值,使用math.sqrt()计算像素点距离。


将渐变图片的大小转换成和头像的大小一样,然后粘贴到图片顶层。使用resize()方法重设图片大小,使用paste()方法粘贴图片。


保存图片,此时的微信头像图片上已经粘贴了透明渐变的国旗图片,微信国旗头像制作完成。
本文介绍了用Python制作微信国旗头像的方法。在本文的代码中,以左上角为圆心,离圆心越远越透明,可以修改key值,调整国旗透明变化的范围。
如果需要制作其他渐变类型,如以右上角为圆心逐渐透明、从左侧向右侧逐渐透明、从上到下逐渐透明等,可以修改国旗渐变部分的代码、翻转图片等。
收起阅读 »
ptrade 微信通知
对于节假日,ptrade经常会被暂停维护。 而有时候维护后需要你手动去重启策略。
所以情况多了,经常会忘记,手动登录进去重启。导致策略没有运行。
所以办法1,在盘前函数加入 微信通知,在交易日,如果盘前(8:30分左右),没有收到微信提醒,那么就需要即使登录到ptrade进行手动重启。
代码如下:
差不多这样就可以了。
不过笔者一般会使用另外一个种方式,因为如果哪一天没有收到,意味这ptrade没有起来,但你没有收到,你也就忘了这么一回事。 所以笔者的做法是,正常情况下不推送,而在ptrade不启动的时候才推送到微信。
下回更新。待续
# 继续更新
每天盘前,ptrade会到mysql插入一条数据,比如当天的日期
然后有个程序每天定时去读取mysql,如果读不到数据,就发送数据给微信即可。
收起阅读 »
所以情况多了,经常会忘记,手动登录进去重启。导致策略没有运行。
所以办法1,在盘前函数加入 微信通知,在交易日,如果盘前(8:30分左右),没有收到微信提醒,那么就需要即使登录到ptrade进行手动重启。
代码如下:
def notify(content=''):

    send_qywx(

        '微信id', '微信key', 'agent', info=content,

        touser= '你的微信名字',

        )


def before_trading_start(context, data):

    now = datetime.datetime.now().strftime('%Y-%m-%d %H:%M:%S')

    notify('Ptrade 盘前运行{}'.format(now))
差不多这样就可以了。
不过笔者一般会使用另外一个种方式,因为如果哪一天没有收到,意味这ptrade没有起来,但你没有收到,你也就忘了这么一回事。 所以笔者的做法是,正常情况下不推送,而在ptrade不启动的时候才推送到微信。
下回更新。待续
# 继续更新
每天盘前,ptrade会到mysql插入一条数据,比如当天的日期
然后有个程序每天定时去读取mysql,如果读不到数据,就发送数据给微信即可。
class DBSelector():

    '''

    数据库选择类

    '''


    def get_engine(self):


        from sqlalchemy import create_engine

        try:

            engine = create_engine(

                'mysql+pymysql://{}:{}@{}:{}/{}?charset=utf8'.format(USER, PASSWORD, MYSQL_HOST, MYSQL_PORT, MYSQL_DB))

        except Exception as e:

            log.error(e)

            return None


        return engine


    def get_mysql_conn(self, db):

        import pymysql

        try:

            conn = pymysql.connect(host=MYSQL_HOST, port=MYSQL_PORT, user=USER, password=PASSWORD, db=db,

                                   charset='utf8')

        except Exception as e:

            log.error(e)

            return None

        else:

            return conn


def main():

    now = datetime.datetime.now()

    if not now.weekday():

        print('not week day')

        return


    db = DBSelector()

    conn = db.get_mysql_conn('ptrade')

    cursor = conn.cursor()

    sql_str = 'select count(*) from `ptrade_runing_status` where `date`=%s limit 1'

    date = now.strftime('%Y-%m-%d')

    cursor.execute(sql_str, (date,))

    result = cursor.fetchone()

    if result[0] == 0:

        send_message_via_wechat('{} ptrade没有启动!'.format(now))


if __name__=='__main__':

    main()
收起阅读 »


2022年上半年 顶流基金亏损排行榜

太惨了。。。。
论绝对金额,亏损最大的是蔡经理,哦不,是蔡狗。
然后就是谢治宇,ikun。。

百度搜索居然支持搜索微信公众号了?!

今天搜索了一些内容,发现公众的内容居然显示在百度搜索结果的第一位,有点神奇。估计两个大厂签订了某些合作协议,流量互通了。 其实早就应该开放了,现在很多优质内容都往公众号流入。 但是这些优质内容只有少部分人浏览。 牛人不会有很多时间看别人群,看别人朋友圈,所以他们接触公众号的内容比较少。
这导致微信公众号里面沉淀的内容 在闭环里面得不得很好利用。 比如一些写程序代码的公众号,一般人都是看到好的,收藏起来,然后在PC浏览器上看。 手机屏幕看代码, 体验十分不好的。
同样,百度也多了一个数据源,不至于被csdn和一些内容农场长期霸占首页的搜索结果。
最受影响的应该是搜狗搜索引擎。不过这个搜索引擎也是及其垃圾,以前用来搜索微信公众号内容,只能完全匹配字样,同义词,近义词的搜索效果很差,出来的内容也不知道按照什么排序,往往得不到自己想要的内容。
收起阅读 »
程序员是怎样删除安卓手机的垃圾文件?
有一台vivo的手机,用了也就1-2年,64GB的内部存储已经所剩无几了,并且每次清理垃圾文件,并无法清理一些系统产生的垃圾文件。
以至于手机的的可用空间越来越少,内置的清理垃圾的功能越来越鸡肋。而第三方的垃圾清理应用只会引来更多的垃圾文件。
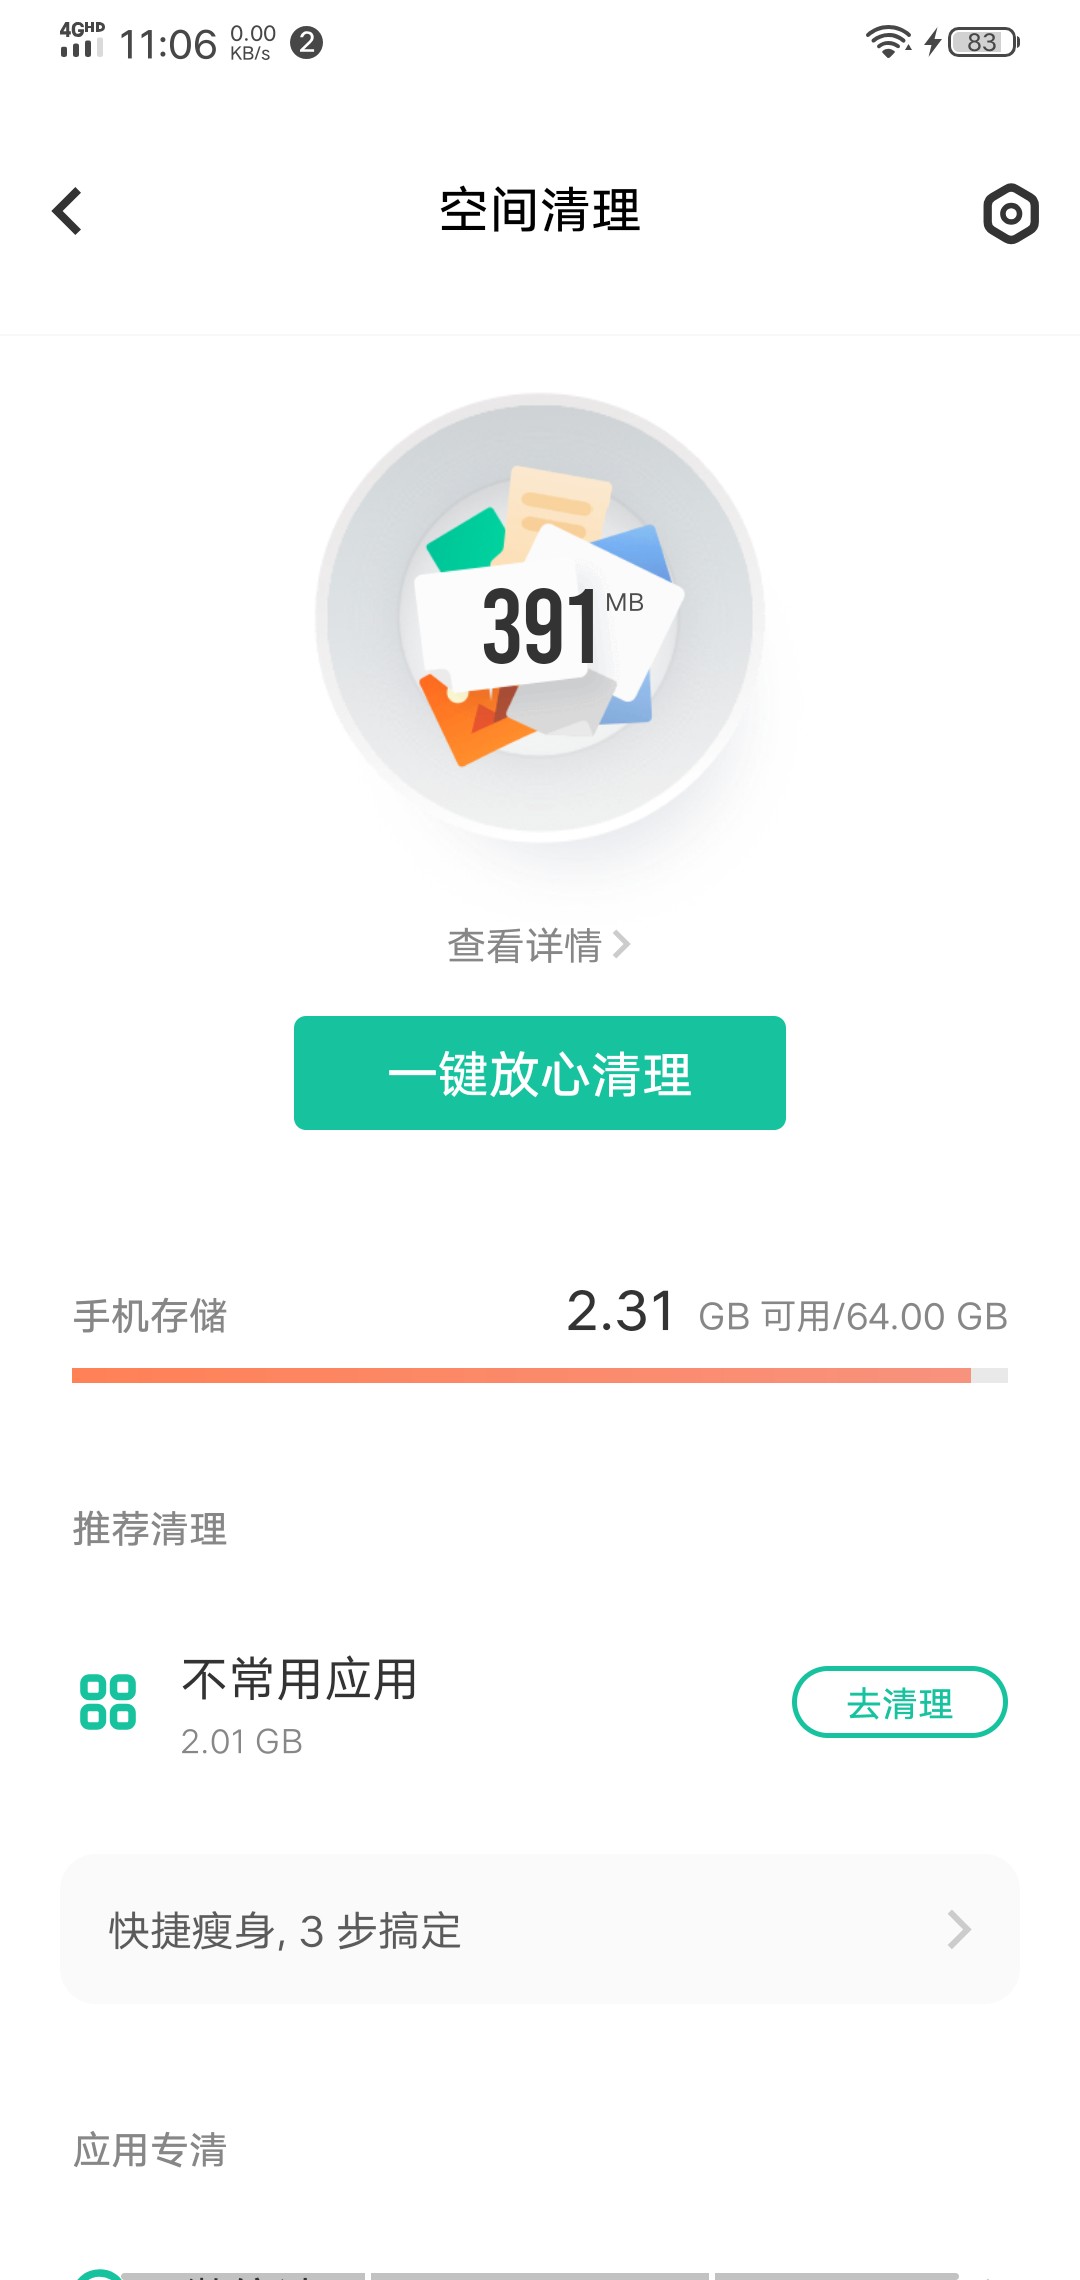
身为一名程序员,就得用geek一点的方法彻底删除垃圾文件,尽可能地释放系统的空间。
由于平时使用的开发环境是Linux,所以下面环境是在Linux下操作,windows的用户应该也可以在git bash下操作。
手机usb 连接电脑
使用usb线连接linux电脑,不一定要adb的功能,但需要电脑能够识别手机的内部存储即可。
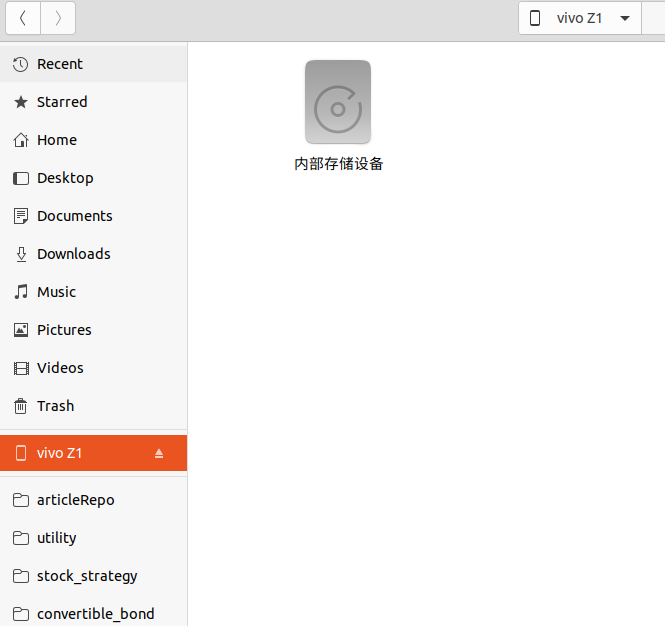
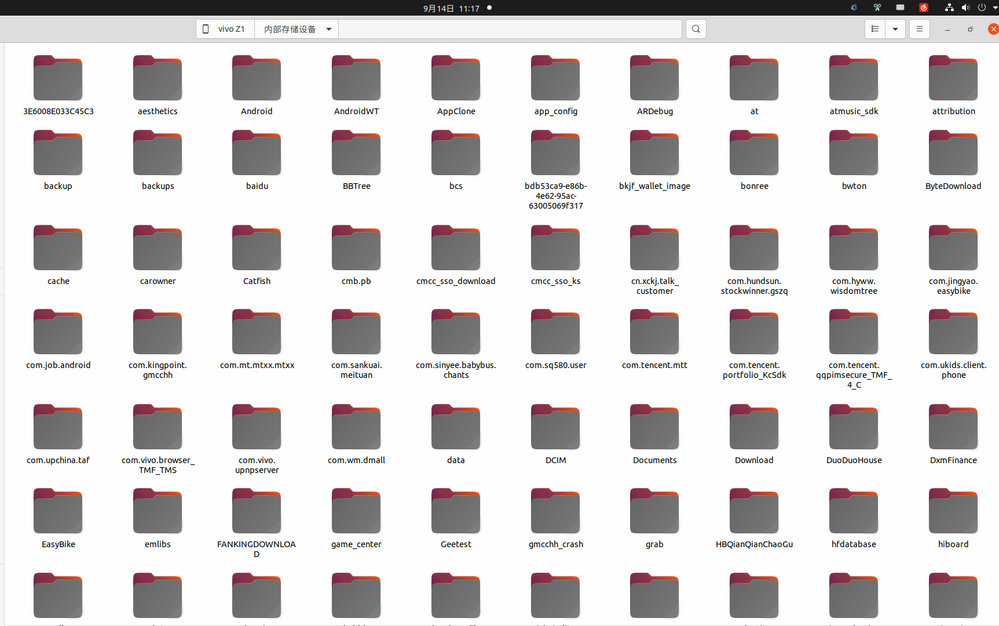
然后点击“内部存储设备”, 在文件内右键,进入Terminal 终端。
执行命令
简单解释一下这个语句。 就是显示当前目录下,第一层目录的占用存储大小情况。-h, human效果,人性化,自动转换文件大小单位。
--max-depth 是显示目录层级数目,如果选择2-3-4等目录,则会把子目录,子子目录的存储大小都显示出来,不过运行数据也会随之变慢。
上面命令一下子就把手机根目录下所有的目录的占用大小都列出来了。可以看到上面红框的地方,是一些缓存没用的东西,我们直接用命令 rm -rf 删除。
或者也可以在文件管理器里面直接删除。
如果有些目录底下有多层目录,那么就是把--max-depth 的值调大一些。 这样就知道他子目录的占用空间情况。
如果只想看看微信文件夹下的空间占用,可以指定目录:
这样就知道哪个目录占用的空间最大,然后点击进去,把没用的目录逐个删除。
经过笔者的测试,使用上述操作后,手机可用存储空间释放了40%的空间。主要是一些app下载的内容,由于app被清理了,结果这些下载内容成了孤立的文件,没有索引到对应的app,一直残留在手机内存。
收起阅读 »
以至于手机的的可用空间越来越少,内置的清理垃圾的功能越来越鸡肋。而第三方的垃圾清理应用只会引来更多的垃圾文件。
身为一名程序员,就得用geek一点的方法彻底删除垃圾文件,尽可能地释放系统的空间。
由于平时使用的开发环境是Linux,所以下面环境是在Linux下操作,windows的用户应该也可以在git bash下操作。
手机usb 连接电脑
使用usb线连接linux电脑,不一定要adb的功能,但需要电脑能够识别手机的内部存储即可。
然后点击“内部存储设备”, 在文件内右键,进入Terminal 终端。
执行命令
du . -h --max-depth=1
简单解释一下这个语句。 就是显示当前目录下,第一层目录的占用存储大小情况。-h, human效果,人性化,自动转换文件大小单位。
--max-depth 是显示目录层级数目,如果选择2-3-4等目录,则会把子目录,子子目录的存储大小都显示出来,不过运行数据也会随之变慢。
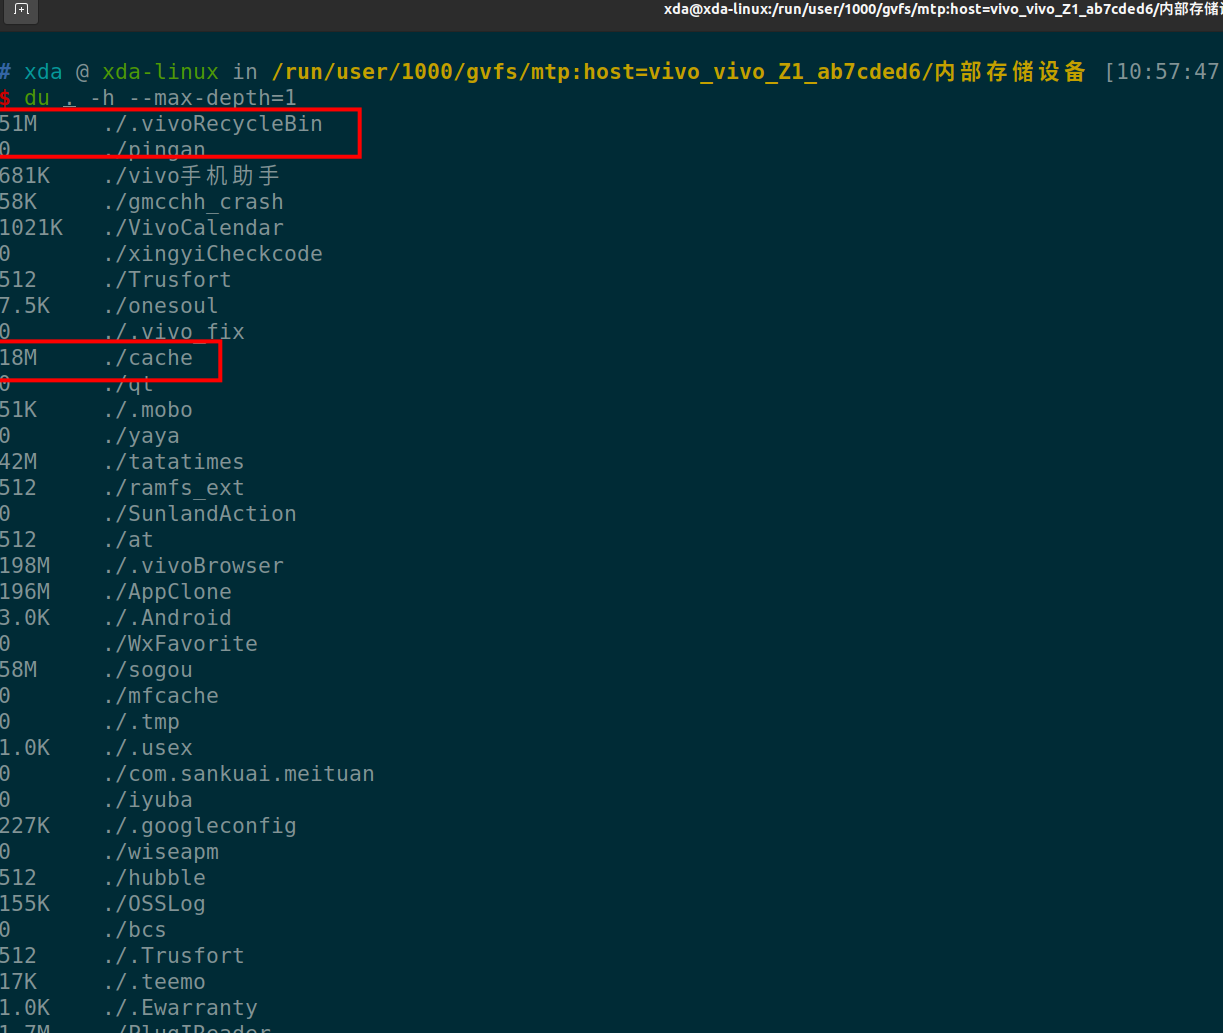
上面命令一下子就把手机根目录下所有的目录的占用大小都列出来了。可以看到上面红框的地方,是一些缓存没用的东西,我们直接用命令 rm -rf 删除。
或者也可以在文件管理器里面直接删除。
如果有些目录底下有多层目录,那么就是把--max-depth 的值调大一些。 这样就知道他子目录的占用空间情况。
如果只想看看微信文件夹下的空间占用,可以指定目录:
du /Weixin/ -h --max-depth=3
这样就知道哪个目录占用的空间最大,然后点击进去,把没用的目录逐个删除。
经过笔者的测试,使用上述操作后,手机可用存储空间释放了40%的空间。主要是一些app下载的内容,由于app被清理了,结果这些下载内容成了孤立的文件,没有索引到对应的app,一直残留在手机内存。
收起阅读 »


ubuntu/linux 64位 安装 kdb+ (需要证书授权)附下载地址
kdb+是一款高速小巧的时序数据库。32位的版本个人可以随意使用。
64位的版本需要申请授权证书。
申请后得到邮件,里面会有证书。

还有64位软件下载地址。文件还是小巧,几百k。没想到一个排名第二的时序数据库,体积居然不到1M。
需要kdb+ 64位安装文件,可以到文末获取。
下载下来解压。
比如解压到目录:
~/tool/l64/
目录下有一个文件夹 l64和一个q.k的文件
l64子文件夹下只有一个文件q , 他是一个可执行文件。在linux下的命令行可以直接运行 ./q
然后把证书文件拷贝到目录 ~/tool/l64/
这时如果直接运行 ./q 但是会报错.
这是因为没有设置环境变量。
windows下也需要设置环境部,linux同理也需要。
linux:
export QHOME="/home/root/tool/l64/"
或者放到bashrc文件里面。
正常运行,会显示 q)

kdb+ 64位安装文件获取方式:
关注后 回复 kdb+
收起阅读 »
64位的版本需要申请授权证书。
申请后得到邮件,里面会有证书。
还有64位软件下载地址。文件还是小巧,几百k。没想到一个排名第二的时序数据库,体积居然不到1M。
需要kdb+ 64位安装文件,可以到文末获取。
下载下来解压。
比如解压到目录:
~/tool/l64/
目录下有一个文件夹 l64和一个q.k的文件
l64子文件夹下只有一个文件q , 他是一个可执行文件。在linux下的命令行可以直接运行 ./q
$ ./q提示缺失证书。
KDB+ 4.0 2022.05.11 Copyright (C) 1993-2022 Kx Systems
l64/ 4()core 23934MB xda xda-linux 127.0.1.1
'licence error: k4.lic
然后把证书文件拷贝到目录 ~/tool/l64/
这时如果直接运行 ./q 但是会报错.
$ ./q -p 5001

KDB+ 4.0 2022.05.11 Copyright (C) 1993-2022 Kx Systems

l64/ 4(24)core 23934MB xda xda-linux 127.0.1.1 EXPIRE 2023.07.18 xxxxx@126.com KXCE #


'2022.09.04T11:34:18.272 couldn't connect to license daemon -- exiting
这是因为没有设置环境变量。
windows下也需要设置环境部,linux同理也需要。
linux:
export QHOME="/home/root/tool/l64/"
或者放到bashrc文件里面。
正常运行,会显示 q)
kdb+ 64位安装文件获取方式:
关注后 回复 kdb+
收起阅读 »
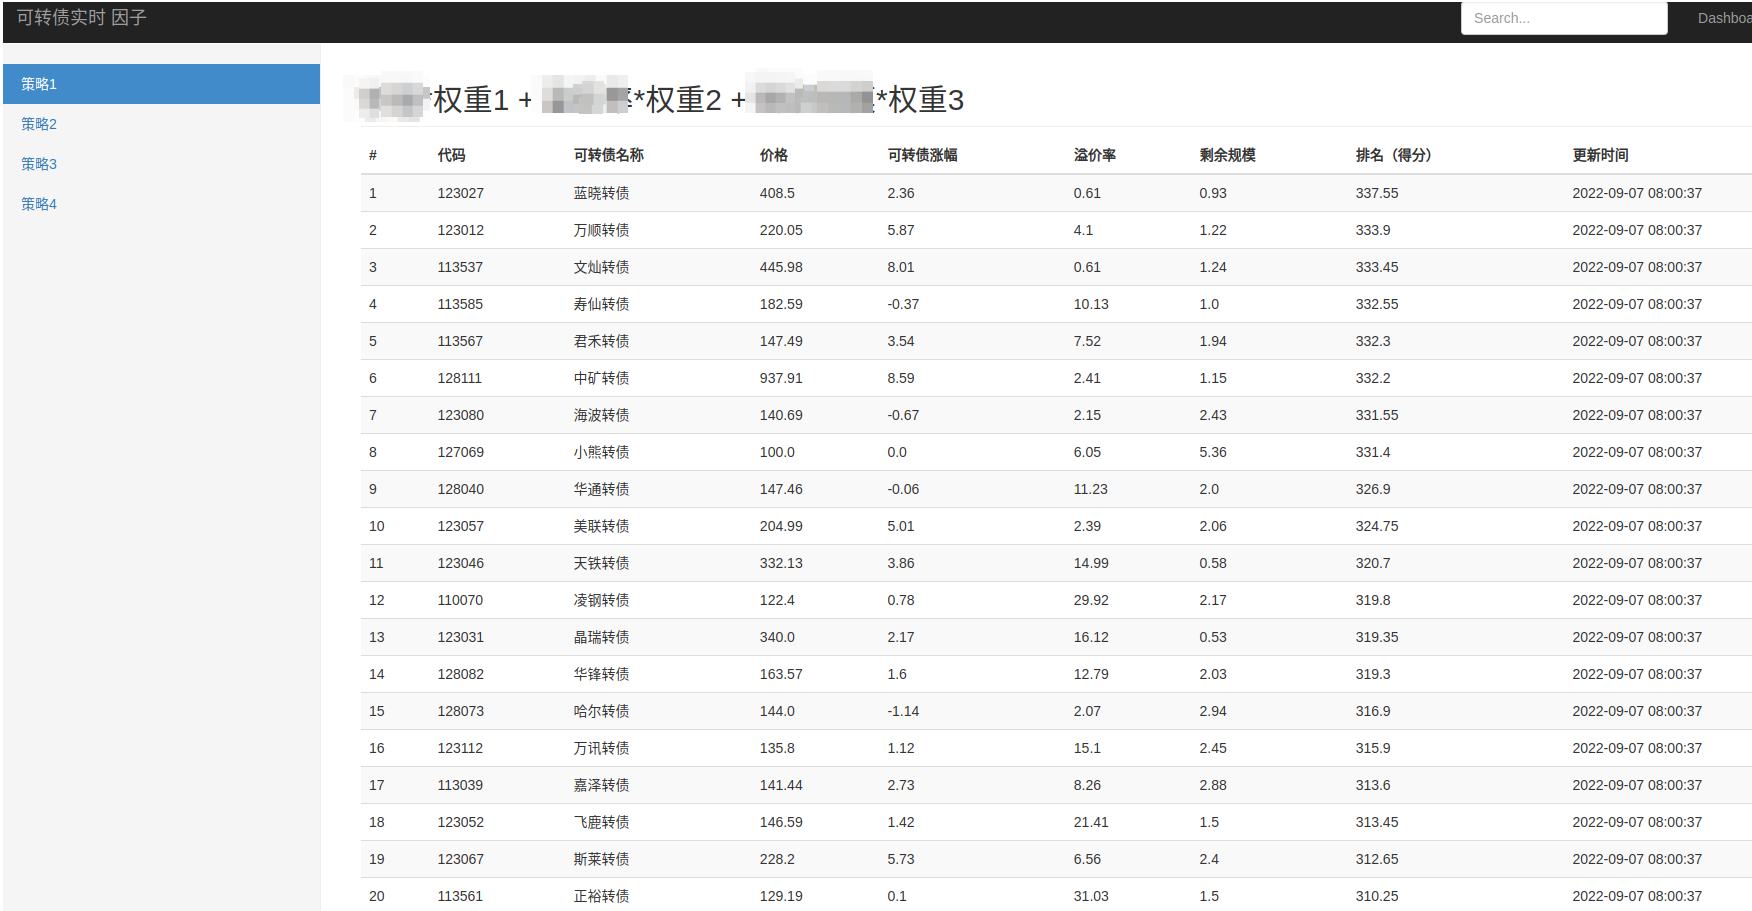
从零开始 手撸一个回测框架 (以可转债双低,低溢价为例)
因为优矿大部分可转债接口开始收费了,之前星球上分享的回测代码基本也跑不了。不过在关停转收费之前,已经把所需的数据下载下来,而最近的数据通过集思录补充既可。
 Mysql 数据
下面是代码主框架,目前通过之前优矿的导出的csv数据 ,计算 各个因子。 通过不同权重评分,进行轮动。
双低和低溢价选债轮动:

上面是主要框架代码, 根据数据来驱动交易。 可以根据不同的时间日期进行回测交易。不同持有个数,不同轮动功能天数。【完整代码可以常见 知识星球】
运行: python main.py

运行后会自动保存一个excel文件:
并且可以生成收益率曲线图:

完整代码与数据可以参考星球代码:
收起阅读 »
下面是代码主框架,目前通过之前优矿的导出的csv数据 ,计算 各个因子。 通过不同权重评分,进行轮动。
class DataFeed:

    def __init__(self):

        self.csv_path = CSV_PATH

        self.position = {}

        self.HighValue = 0

        self.Start_Cash = 1000000  # 初始资金

        self.MyCash = self.Start_Cash

        self.Withdraw = 0

        self.daily_netvalue =

        self.current_day = 0

        self.PosValue = 0

        self.threshold = 0  # 阈值

        self.HighValue = self.Start_Cash

        self.date_list, self.source = self.feed()

        self.day_count = 0


    def unpossibile(self, df, date):

        # 剔除当日涨停的转债,买不入

        raise_limited_dict = {

            '2022-04-08': ['127057', ],

            '2022-07-27': ['127065', ],

            '2022-07-28': ['127065', ],

        }

        target_list = raise_limited_dict.get(date, None)

        if target_list is None:

            return df


        return df.drop(index=target_list, axis=1)


    def feed(self):

        df = pd.read_csv(self.csv_path,

                         encoding='utf8',

                         dtype={'tickerEqu': str, 'tickerBond': str, 'secID_x': str},

                         )

        del df['Unnamed: 0']

        df['tradeDate'] = pd.to_datetime(df['tradeDate'], format='%Y-%m-%d')

        df = df.set_index('tradeDate')

        date_set = set(df.index.tolist())

        date_list = list(map(lambda x: x.strftime('%Y-%m-%d'), date_set))

        date_list.sort()

        return date_list, df


    def filters(self, df, today):

        # 过滤条件,可添加多个条件

        df = self.unpossibile(df, today)

        return df


    def logprint(self, current):

        log.info('当前日期{}'.format(current))


    def run(self):

        for current in self.date_list:


            if current < START_DATE or current > END_DATE:

                continue


            if self.day_count % FREQ != 0:

                self.get_daily_netvalue(current)

            else:

                self.handle_data(current)


            self.day_count += 1


        self.after_trade()
双低和低溢价选债轮动:
上面是主要框架代码, 根据数据来驱动交易。 可以根据不同的时间日期进行回测交易。不同持有个数,不同轮动功能天数。【完整代码可以常见 知识星球】
运行: python main.py
运行后会自动保存一个excel文件:
并且可以生成收益率曲线图:
完整代码与数据可以参考星球代码:
收起阅读 »
python获取通达信可转债日线和分时数据
昨天看到优矿平台公告,开始对大部分数据获取接口进行收费。

除了优矿,还有哪些可以获取可转债日线,甚至分时tick数据呢?当然笔者压箱底里面还有很多可用数据源的。本文就简单介绍其中一个,下通达信数据源。
安装
使用pip安装第三方库pytdx
分时数据
下面6行python代码, 就可以获取通达信的可转债分时数据。

如果需要遍历当前最新可转债代码,需要结合前面的文章。【注意这代码会定期更新,因网站架构或者字段是不定时变动】
不过前面的接口只能读取800条数据,以一天240条数据计算,只能读取2天多的数据量,对于需要更多数据的朋友来说,肯定不够的。或者有一个办法,把上面代码写成定时任务,就可以每天收盘后自动存储对应的数据。
如果需要更多的历史数据,那么可以使用pytdx的另外一个功能,那就是使用python读取通达信本地数据文件。
先用通达信同步1分钟(或5分钟)数据到本地.

选择沪深京分钟线,当然,其他数据你也可以选择。勾选一分钟线数据或者5分钟线数据,还有日期。不过这里日期会有限制,只能下载100天的1分钟线,或者500天的5分钟线。所以如果长期需要这个数据,你可以每隔一段时间下载一次。
数据保存路径:通达信安装目录的 vipdoc 子目录

如果你需要更久的历史数据,可以到网上找找,下载下来后按照下面代码读取即可。

得到dataframe对象后,接着可以保存为excel,数据库都很简单了。一条语句的事情。
可转债日线数据
当然,能够获取到分钟数据,对于日线数据更加不在话下了。日线数据并没有日期限制,想下多少有多少。

如果想获取正股或者其他股票数据,只需要把代码替换成正股股票代码即可。
如果分钟数据还不满足,还可以使用更小粒度的tick数据。下回有空再继续介绍,敬请关注。

欢迎关注公众号 收起阅读 »
除了优矿,还有哪些可以获取可转债日线,甚至分时tick数据呢?当然笔者压箱底里面还有很多可用数据源的。本文就简单介绍其中一个,下通达信数据源。
安装
使用pip安装第三方库pytdx
pip install pytdx
分时数据
下面6行python代码, 就可以获取通达信的可转债分时数据。
from pytdx.hq import TdxHq_API

api = TdxHq_API()

with api.connect('119.147.212.81', 7709):

    data = api.get_security_bars(7, 0, '123045', 0, 240) # 123045 为转债代码 ,240 为获取 240个转债数据

    df = api.to_df(data)

    df=df.sort_values('datetime')
如果需要遍历当前最新可转债代码,需要结合前面的文章。【注意这代码会定期更新,因网站架构或者字段是不定时变动】
不过前面的接口只能读取800条数据,以一天240条数据计算,只能读取2天多的数据量,对于需要更多数据的朋友来说,肯定不够的。或者有一个办法,把上面代码写成定时任务,就可以每天收盘后自动存储对应的数据。
如果需要更多的历史数据,那么可以使用pytdx的另外一个功能,那就是使用python读取通达信本地数据文件。
先用通达信同步1分钟(或5分钟)数据到本地.
选择沪深京分钟线,当然,其他数据你也可以选择。勾选一分钟线数据或者5分钟线数据,还有日期。不过这里日期会有限制,只能下载100天的1分钟线,或者500天的5分钟线。所以如果长期需要这个数据,你可以每隔一段时间下载一次。
数据保存路径:通达信安装目录的 vipdoc 子目录
比如我的通达信客户端安装在 c:\new_tdx 下,


即


c:\new_tdx\vipdoc\sz\lday\ 下是深圳的日k线数据

c:\new_tdx\vipdoc\sh\lday\ 下是上海的日k线数据

c:\new_tdx\vipdoc\sh\minline\ 下是上海的分钟线数据

c:\new_tdx\vipdoc\sz\minline\ 下是深圳的分钟线数据
如果你需要更久的历史数据,可以到网上找找,下载下来后按照下面代码读取即可。
        from pytdx.reader import TdxMinBarReader

        path='/home/xda/Downloads/sz128014.lc1'

        reader = TdxMinBarReader()

        df = reader.get_df(path)

        #df.to_excel('tick.xlsx') # 导出为excel
得到dataframe对象后,接着可以保存为excel,数据库都很简单了。一条语句的事情。
可转债日线数据
当然,能够获取到分钟数据,对于日线数据更加不在话下了。日线数据并没有日期限制,想下多少有多少。
api = TdxHq_API()

api = api.connect('119.147.212.81', 7709)

data=api.get_k_data('123045', '2020-05-01', '2022-08-26') # 123045 为可转债代码,可以替换任意代码

data.to_excel('k-line.xlsx')
如果想获取正股或者其他股票数据,只需要把代码替换成正股股票代码即可。
如果分钟数据还不满足,还可以使用更小粒度的tick数据。下回有空再继续介绍,敬请关注。
欢迎关注公众号 收起阅读 »
6行python代码 获取通达信的可转债分时数据
6行python代码 获取通达信的可转债分时数据。
 点击查看大图
如果需要遍历当前最新可转债代码(集思录),需要结合前面的文章。
公众号:
收起阅读 »
from pytdx.hq import TdxHq_API

api = TdxHq_API()

with api.connect('119.147.212.81', 7709):

    data = api.get_security_bars(7, 0, '123045', 0, 240) # 123045 为转债代码 ,240 为获取 240个转债数据

    df = api.to_df(data)

    df=df.sort_values('datetime')
如果需要遍历当前最新可转债代码(集思录),需要结合前面的文章。
公众号:
收起阅读 »
Ptrade 逆回购+自动申购新股可转债
分享一些最基本的ptrade代码实盘例子。 持续更新,喜欢的朋友请关注本站哦。
本站所有代码均经过实盘验证。
上面代码设定在13:30分申购新股,新债;
在14:57分申购深圳逆回购R-001
喜欢的朋友拿去,欢迎转载。
欢迎关注公众号
收起阅读 »
本站所有代码均经过实盘验证。
# ptrade软件-量化-回测 里,新建策略,复制全文粘贴进去,周期选分钟,再到交易里新增交易


import time


def reverse_repurchase(context):

    cash = context.portfolio.cash

    amount = int(cash/1000)*10

    log.info(amount)

    order('131810.SZ', -1*amount) # 深圳逆回购,


def ipo(context):

    ipo_stocks_order()


def initialize(context):

    g.flag = False

    log.info("initialize g.flag=" + str(g.flag) )

    run_daily(context, reverse_repurchase, '14:57')

    run_daily(context, ipo, '13:30')


def before_trading_start(context, data):

    pass


def handle_data(context, data):

    pass


def on_order_response(context, order_list):

    # 该函数会在委托回报返回时响应

    log.info(order_list)
上面代码设定在13:30分申购新股,新债;
在14:57分申购深圳逆回购R-001
喜欢的朋友拿去,欢迎转载。
欢迎关注公众号
收起阅读 »
Ptrade 获取当天可转债代码列表
注意Ptrade版本:2022版,旧版应该不行的。
可以在开盘的时候获取所有可转债列表。
如果需要获取可转债溢价率,评级,剩余规模,强赎等数据,可以调用我之前提供的接口。
需要的可以关注个人星球和公众号。
欢迎关注公众号
收起阅读 »
可以在开盘的时候获取所有可转债列表。
def initialize(context):

    run_daily(context, get_trade_cb_list, "9:25")


def before_trading_start(context, data):

    # 每日清空,避免取到昨日市场代码表

    g.trade_cb_list =


def handle_data(context, data):

    pass


# 获取当天可交易的可转债代码列表

def get_trade_cb_list(context):

    cb_list = get_cb_list()

    cb_snapshot = get_snapshot(cb_list)

    # 代码有行情快照并且交易状态不在暂停交易、停盘、长期停盘、退市状态的判定为可交易代码

    g.trade_cb_list = [cb_code for cb_code in cb_list if

                       cb_snapshot.get(cb_code, {}).get("trade_status") not in

                       [None, "HALT", "SUSP", "STOPT", "DELISTED"]]

    log.info("当天可交易的可转债代码列表为:%s" % g.trade_cb_list)
如果需要获取可转债溢价率,评级,剩余规模,强赎等数据,可以调用我之前提供的接口。
需要的可以关注个人星球和公众号。
欢迎关注公众号
收起阅读 »

